ZeroTier VPN Install
We use ZeroTier to connect remotely to Autonomy Park assets (computers, robots, etc.). ZeroTier is one of the few VPN services that allows for multicast, which lets us publish and subscribe to ROS topics when we are not at the park.
Network ID
Navigate to the "ZeroTier" bookmark when signed in to Chrome as the Autonomy Park to find the 16-character Network ID. Do not share this ID.
Warning
If your local network uses the subnet 192.168.1.XXX you will run into IP conflicts. We are working on changing this.
Windows and macOS
To install ZeroTier on Windows or macOS, go to the official download page at https://www.zerotier.com/download/ and download and install the client. After installation, the ZeroTier icon will appear in your system tray.
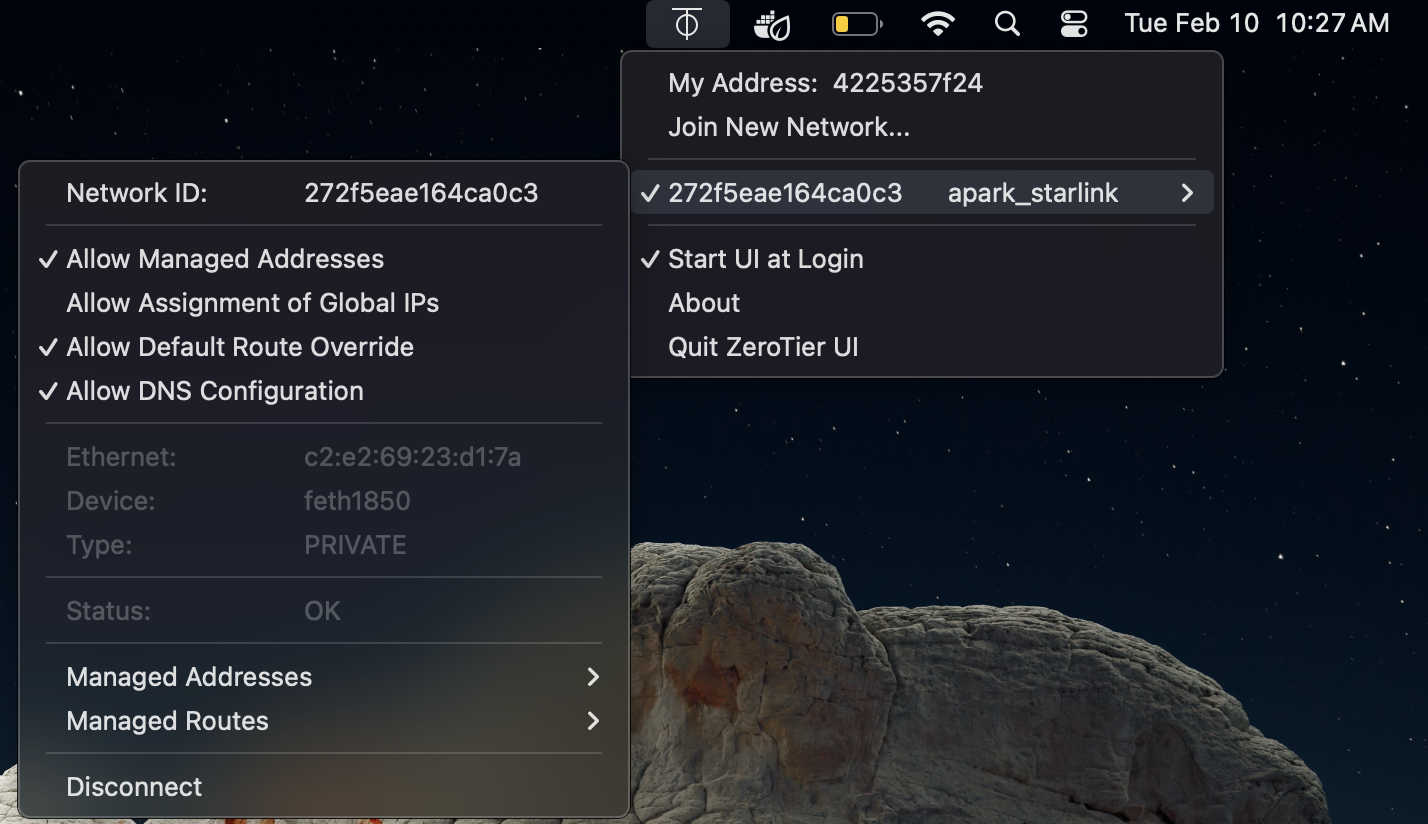
To connect to a network, right-click (Windows) or click (macOS) on the the system tray icon and select "Join New Network." Paste in the Network ID and click "Join." To confirm the connection, right-click (Windows) or click (macOS) the icon again. A checkmark will appear next to the Network ID, confirming a successful connection. To disconnect, click on the connected network item and select "Disconnect."
IMPORTANT: You must enable "Allow Default Route Override" and "Allow DNS Configuration". This will allow ZeroTier to redirect your network traffic through the ZeroTier network first rather than your default.
Linux
To install ZeroTier on Linux, run the following command in your terminal:
curl -s https://install.zerotier.com | sudo bash
Once ZeroTier is installed, run systemctl status zerotier-one to ensure that ZeroTier is running. If it is not running, enter the command sudo systemctl start zerotier-one. Next, connect the Autonomy Park network. Run
sudo zerotier-cli join $NETWORK
$NETWORK is the placeholder for the Autonomy Park Network ID. It should return 200 join OK.
You are now connected to the Autonomy Park LAN. When you wish to connect/disconnect from ZeroTier, run sudo systemctl start zerotier-one or sudo systemctl stop zerotier-one, respectively.
Authorizing Your Device
Do not forget this step. After completing the installation steps, you should see the number of devices in the ZeroTier dashboard increase by one. Document the new computer you added by finding it, clicking "Edit", and filling out the Name and Description. Mark the checkbox next to "Authorized" at the top of the pop-up to allow access to the Autonomy Park LAN.