Motor Soldering Guide
At a glance
Safety, tools, and steps for soldering male connectors to a Homebrew's motor wires. This is a step in building a Homebrew.
Guide for soldering male connectors to motor wires. Read the safety section and gather the tools first.
Personal Protective Equipment
- Required: Fume extractor
- Optional: Mask, gloves, glasses
Safety
- Avoid inhaling fumes from burning flux (a polymer).
- Tie back hair and loose clothing.
- Always place the soldering iron in its holder when not in use.
- Do not touch the soldering iron unless unplugged and cooled for at least 5 minutes.
- Always turn off the soldering iron when walking away.
- Use pliers to hold workpieces, as they conduct heat quickly.
- Remove all flammable objects from the workspace.
- Remove smart watches.
- Do not use phones at the work station, and wash your hands, to avoid spreading metal or lead traces.
Tools
- Lead-free solder
- Drone motor
- 3 male connectors
- Wire cutters
- Wire strippers (use the 12-gauge notch)
- Desoldering wick
- Work holder (e.g., helping hands)
- Pliers
Procedure
Prepare the Motor and Wires
- Take the motor out of the box.
- Use wire cutters to remove the original connectors.
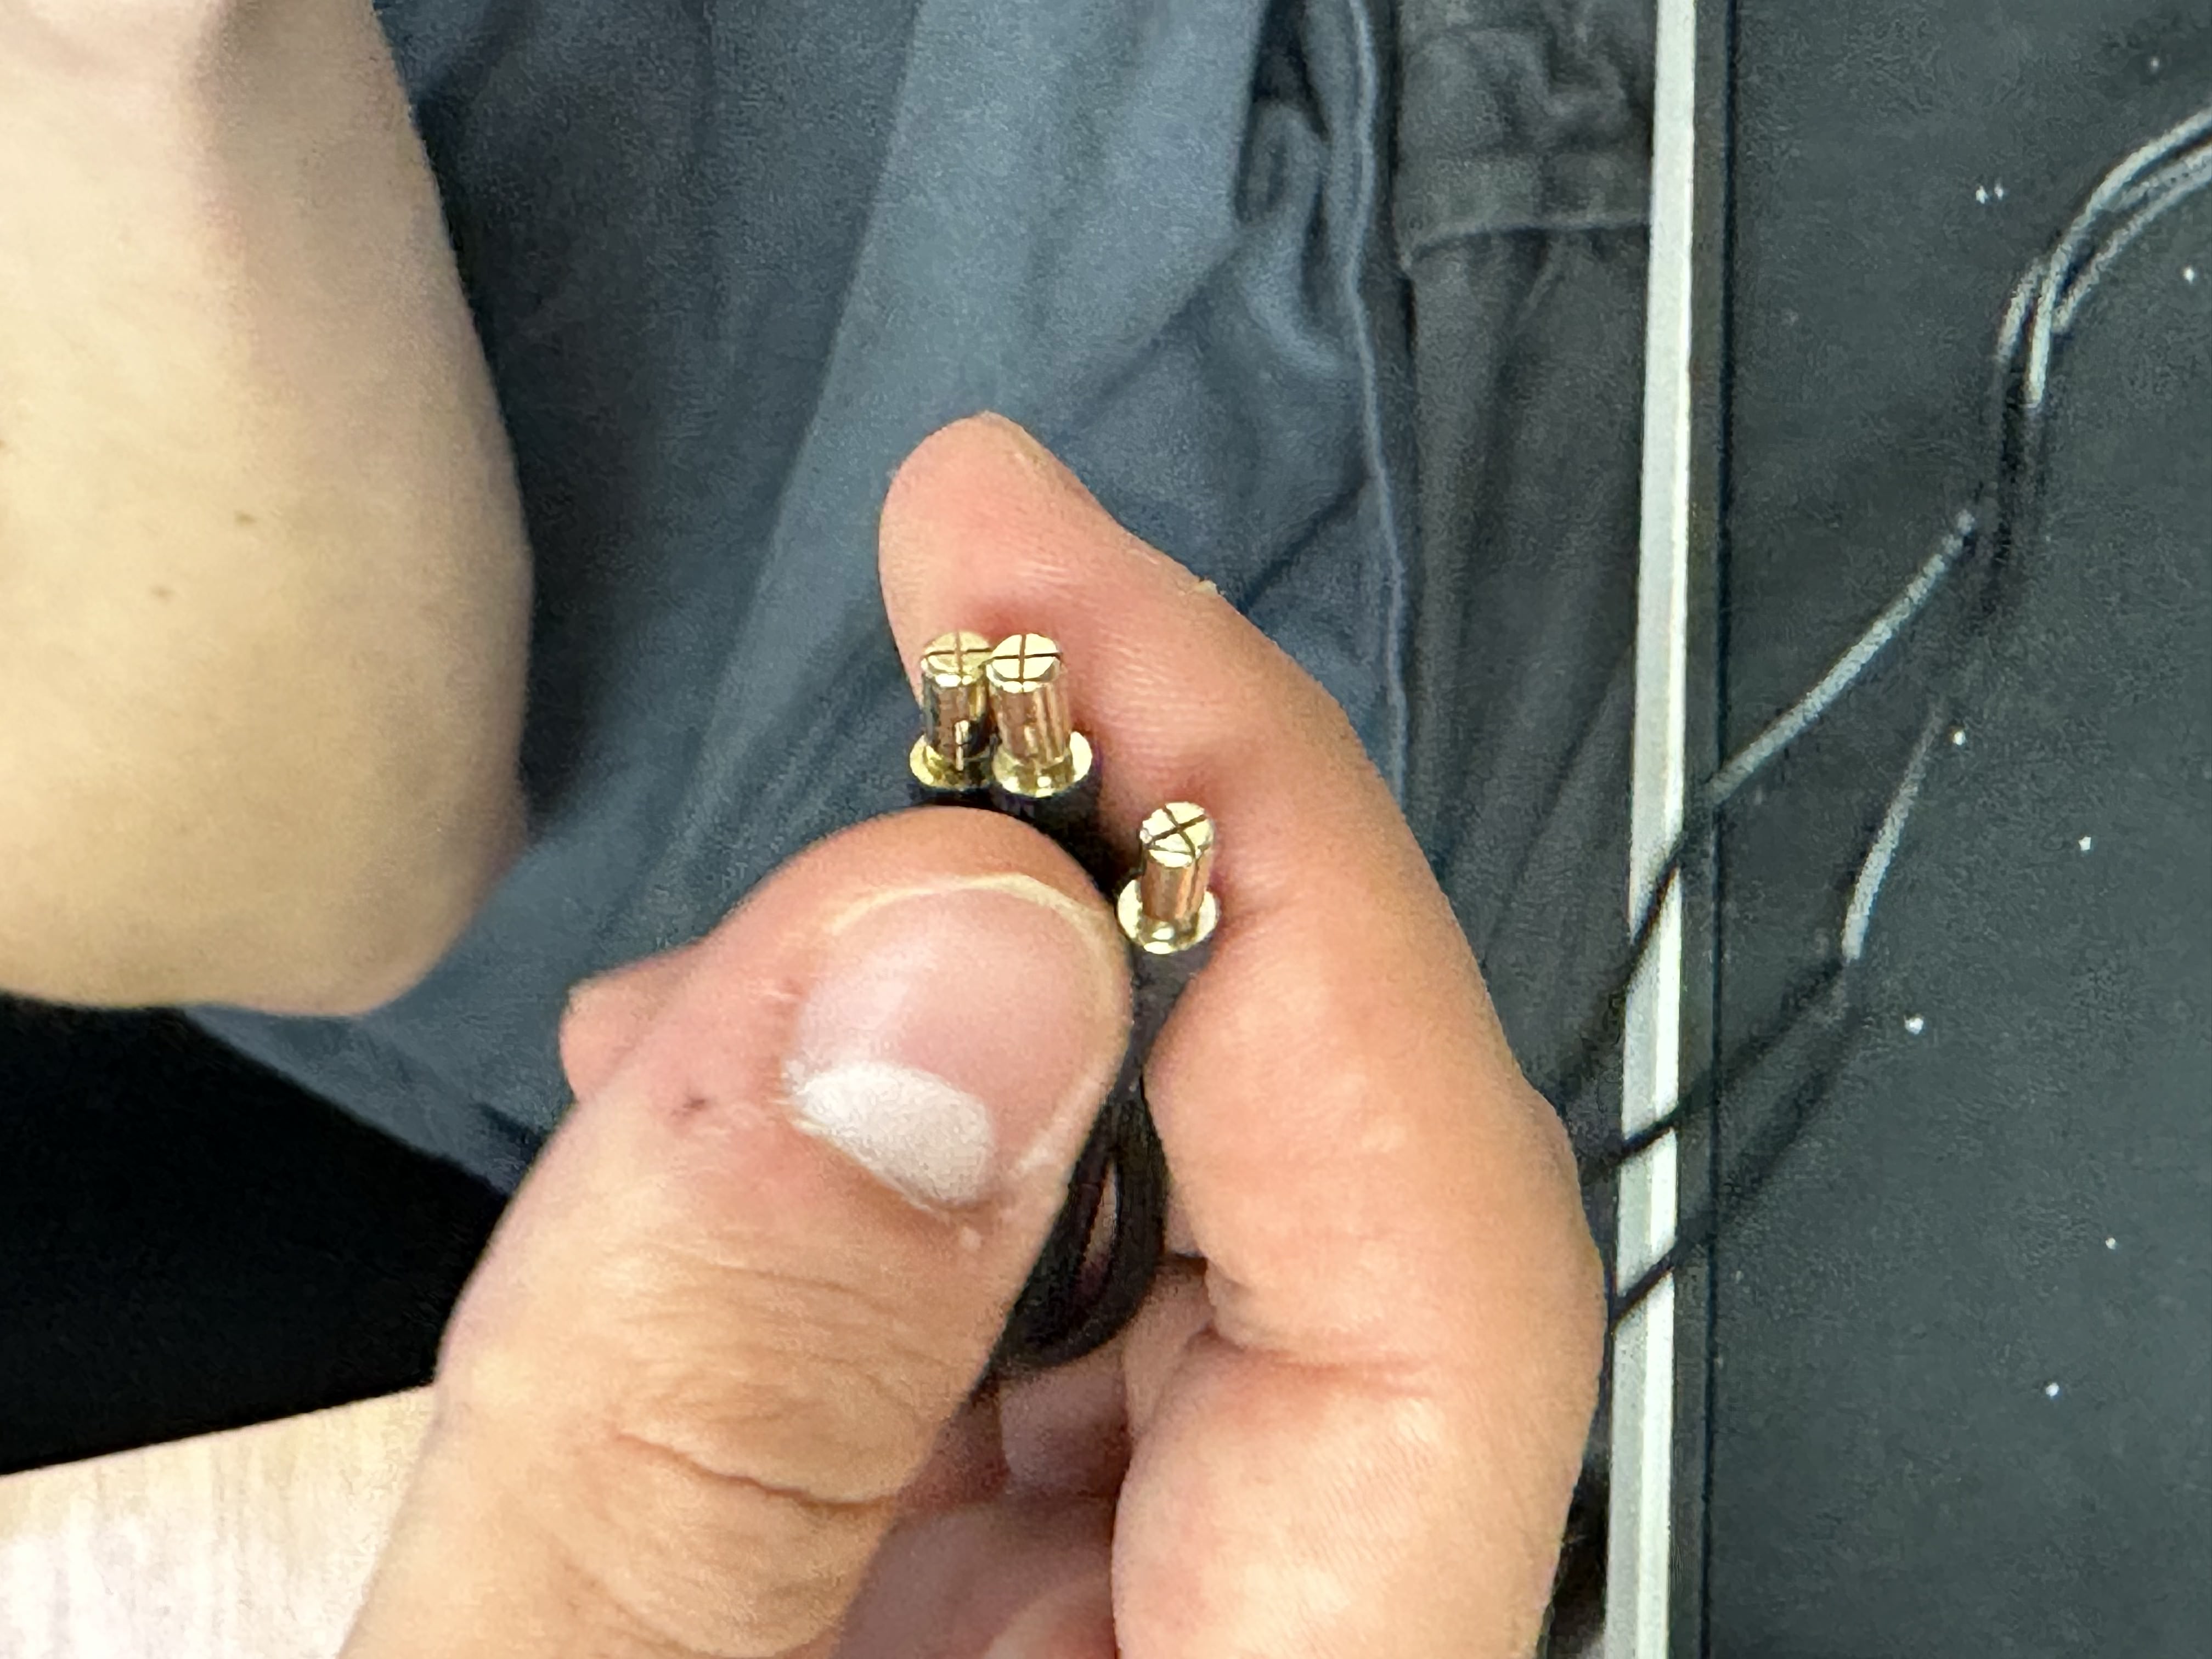
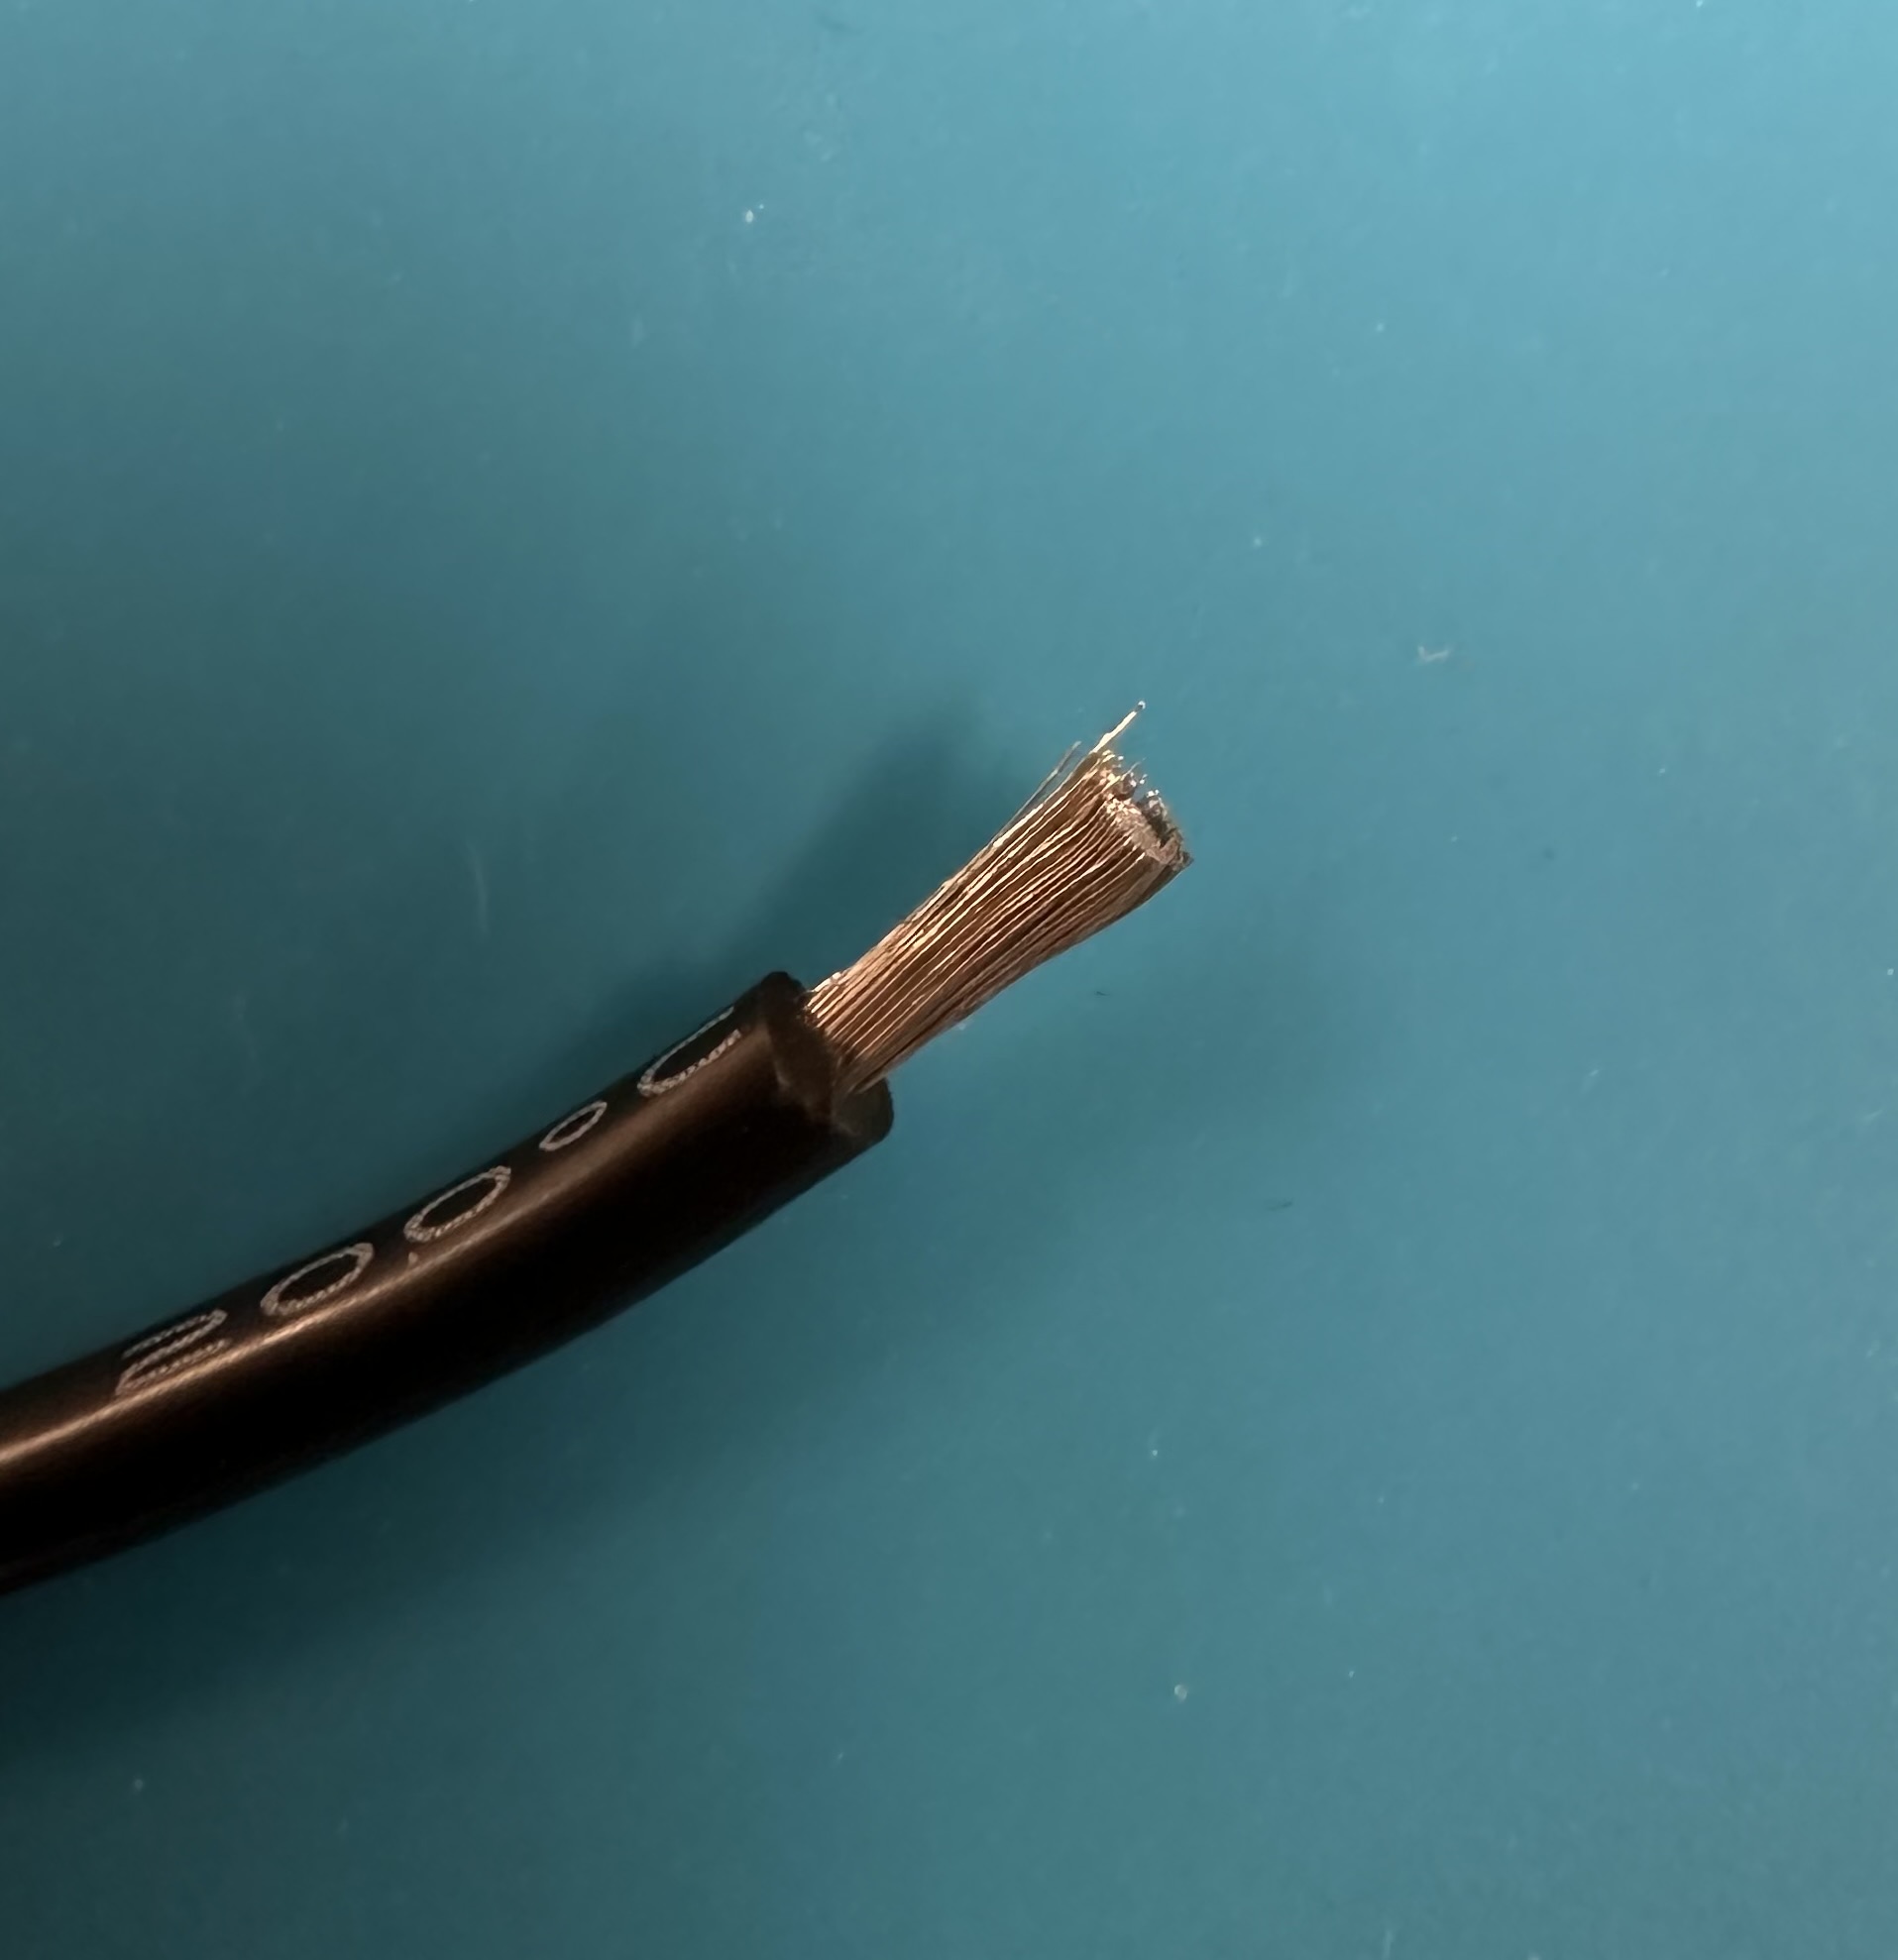
Strip the Wire Insulation
- Use a wire stripper to remove about 3mm of insulation.
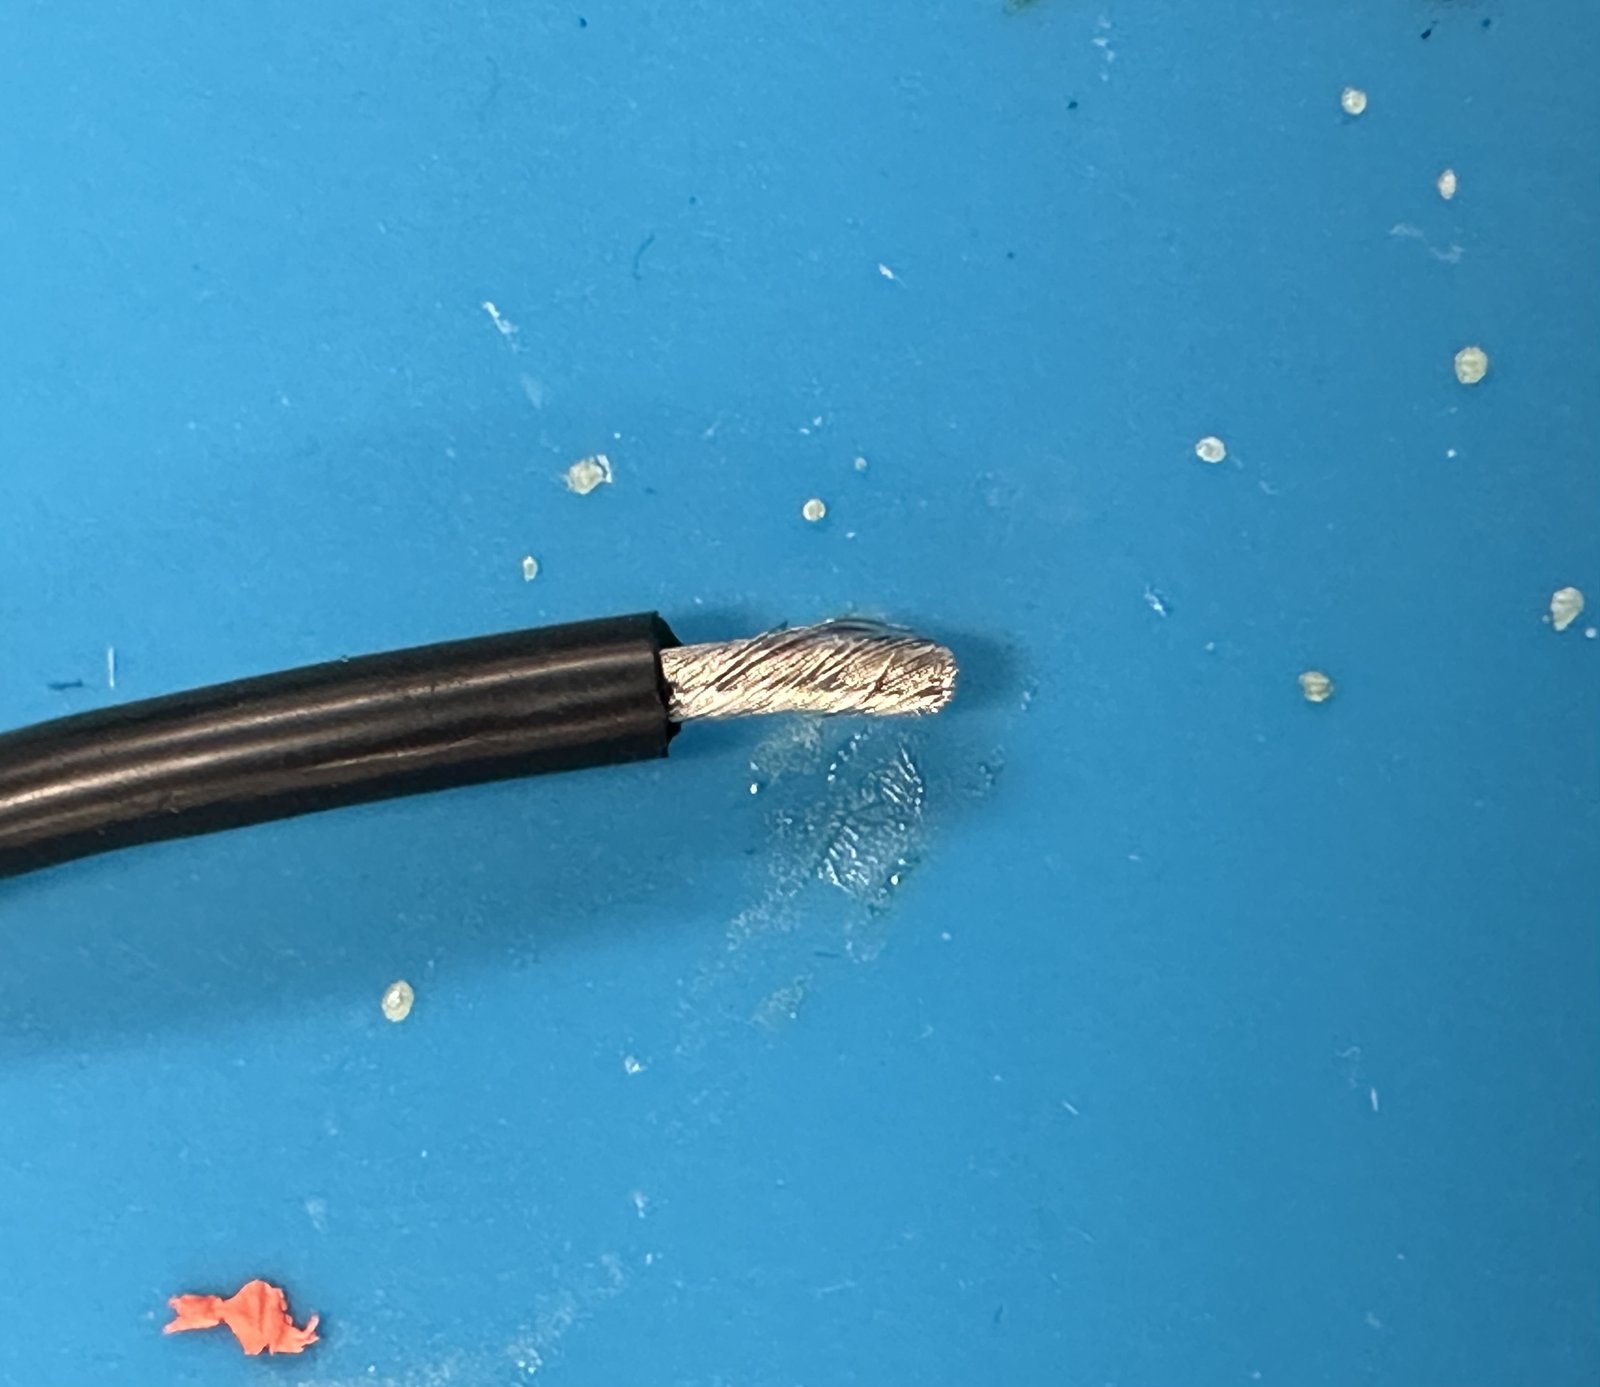
- Twist the exposed wire so no strands are loose.
Prepare the Connector
- Grab a male connector.
- Place the wire and connector on a soldering mat.
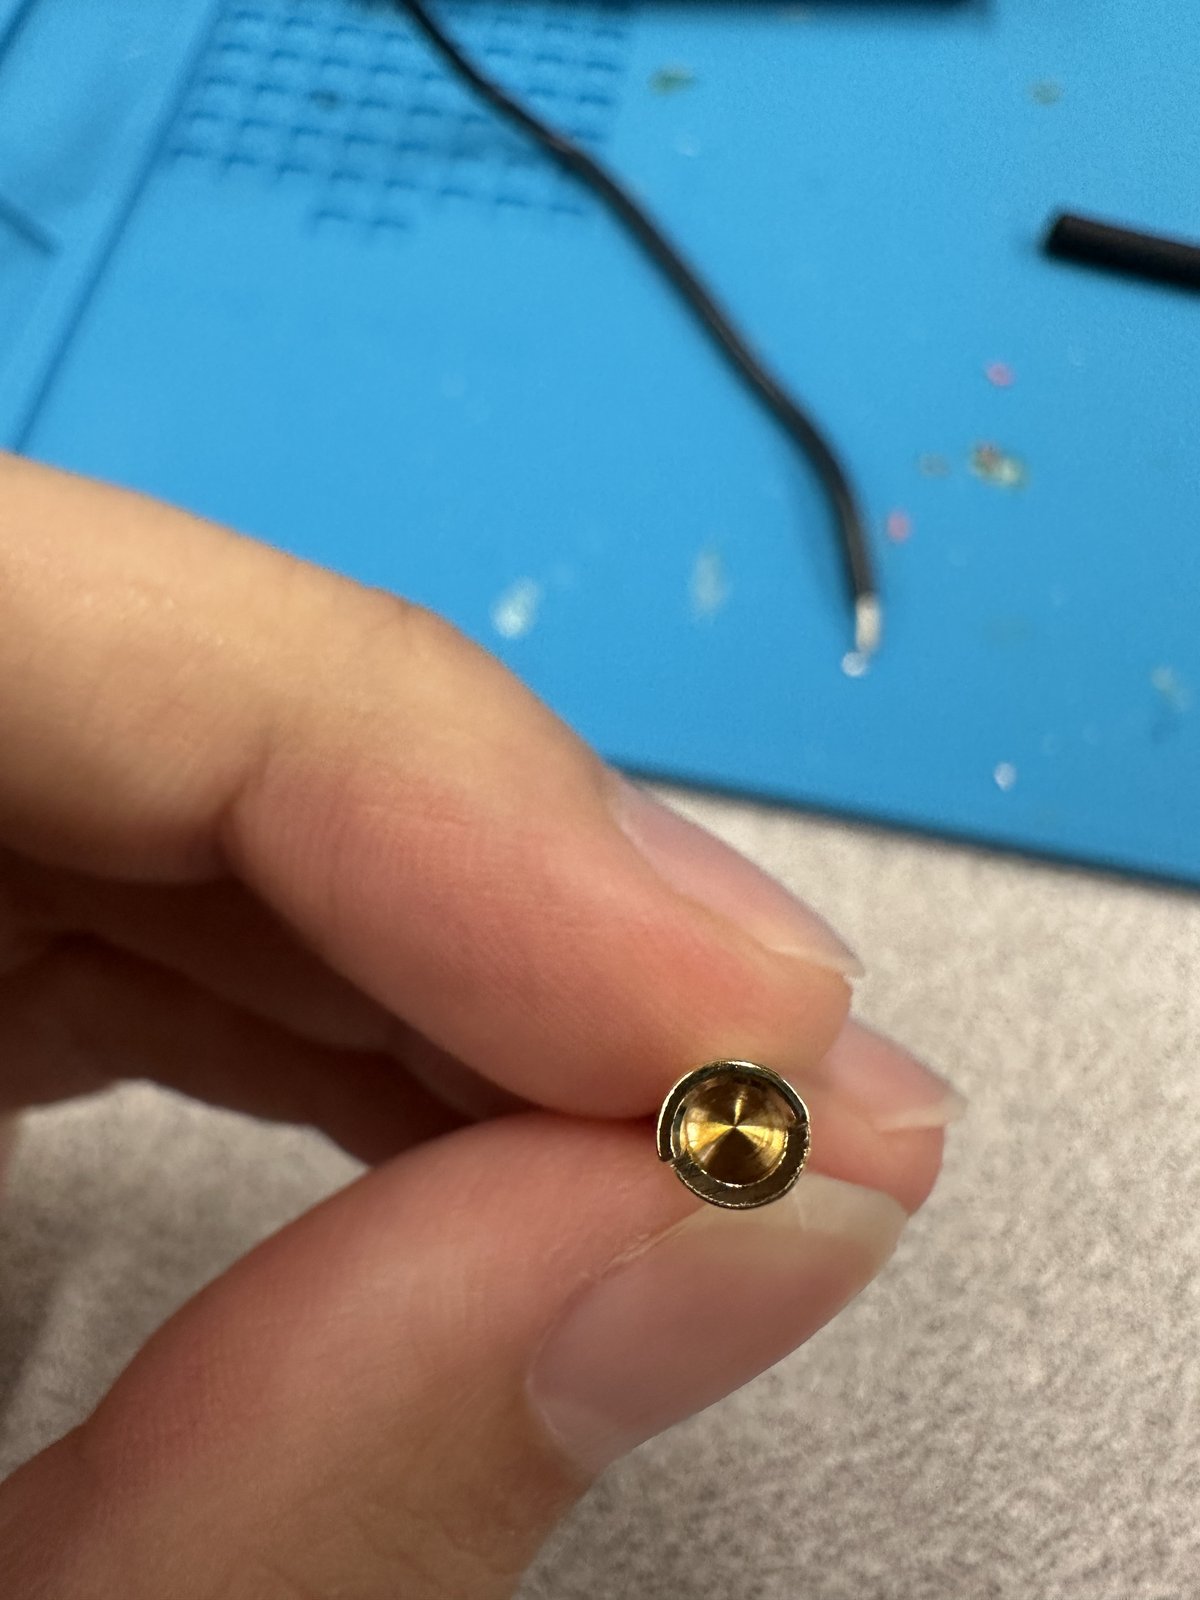
- Align the tip of the wire so the insulation meets the connector’s end.
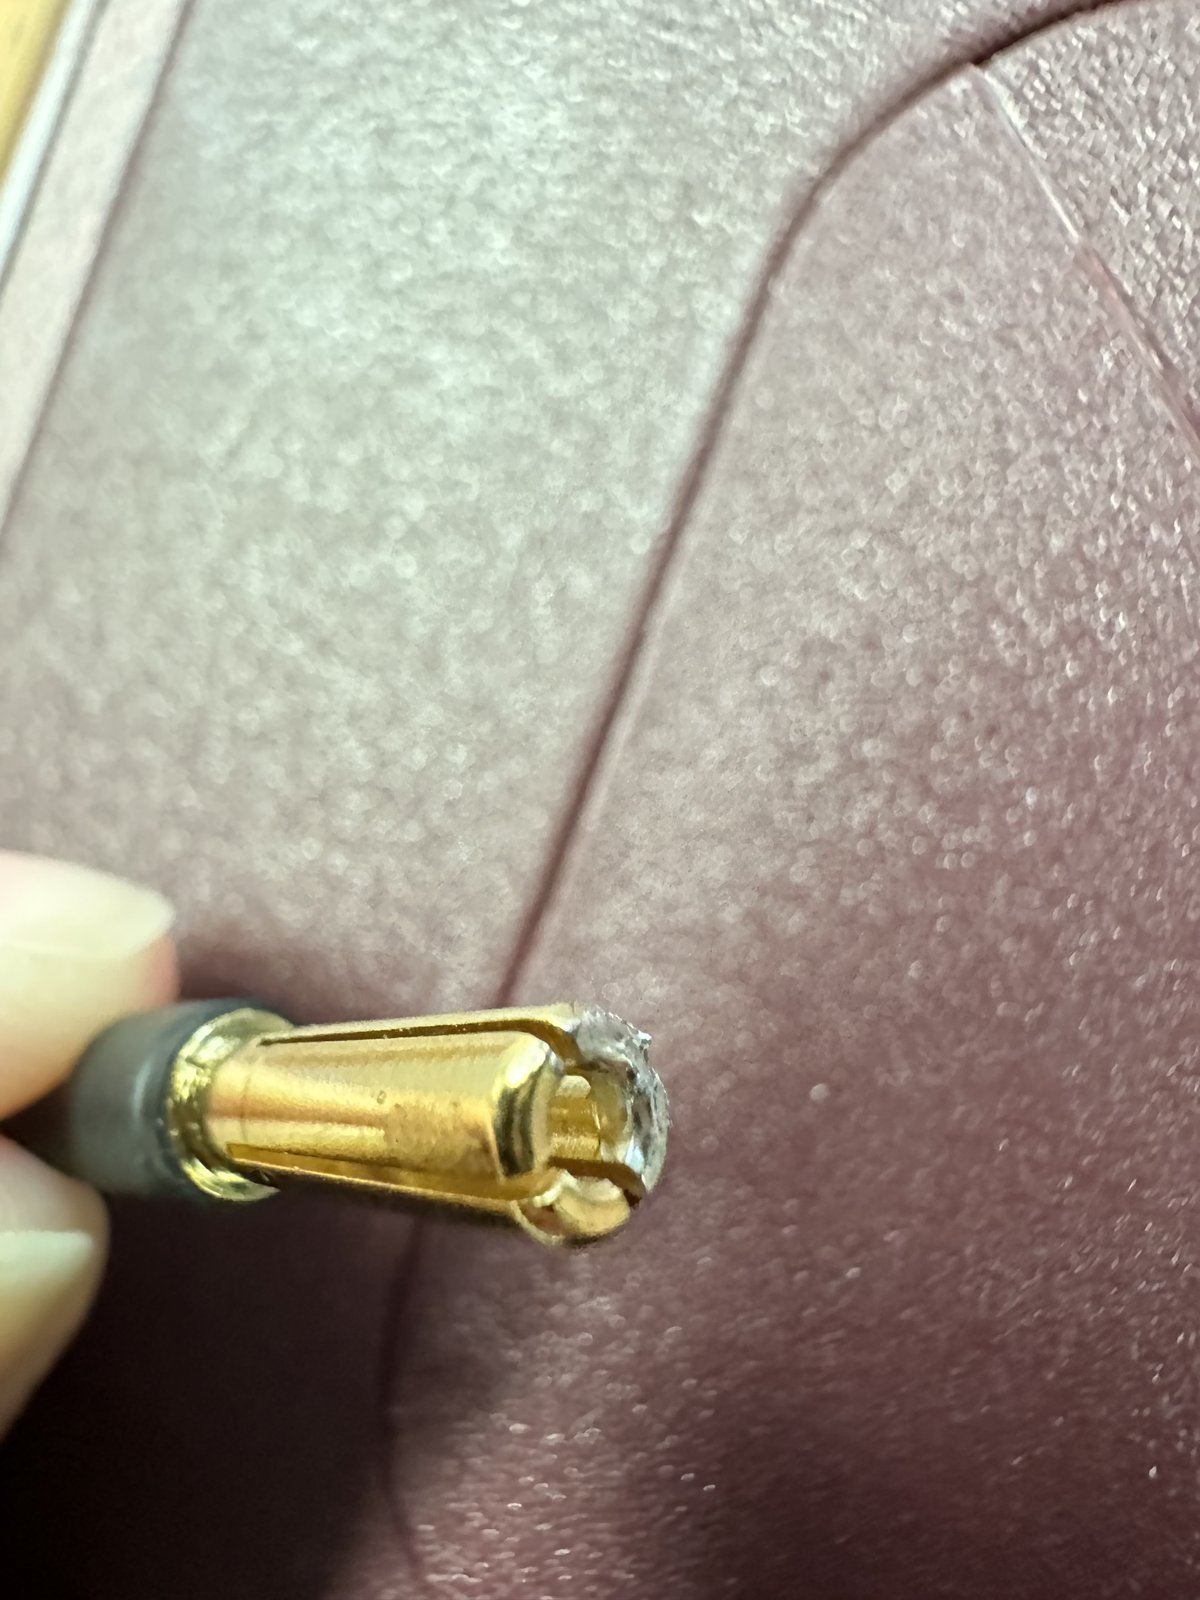
Notice the cone-shaped tip in the image below.
- Use a heavy object to press down on the wire and another to secure the connector.
Prepare the Soldering Iron
- Turn on the fume extractor/fan and your soldering iron.
- Set the iron to 400°C (750°F).
- Use the largest soldering tip available, preferably knife-edge. Unscrew and replace the tip carefully, avoiding damage to the heating element.
- Clean and tin the tip by flicking it in the brass wool and applying solder before use, then place the iron in its holder.
Solder the Wire to the Connector
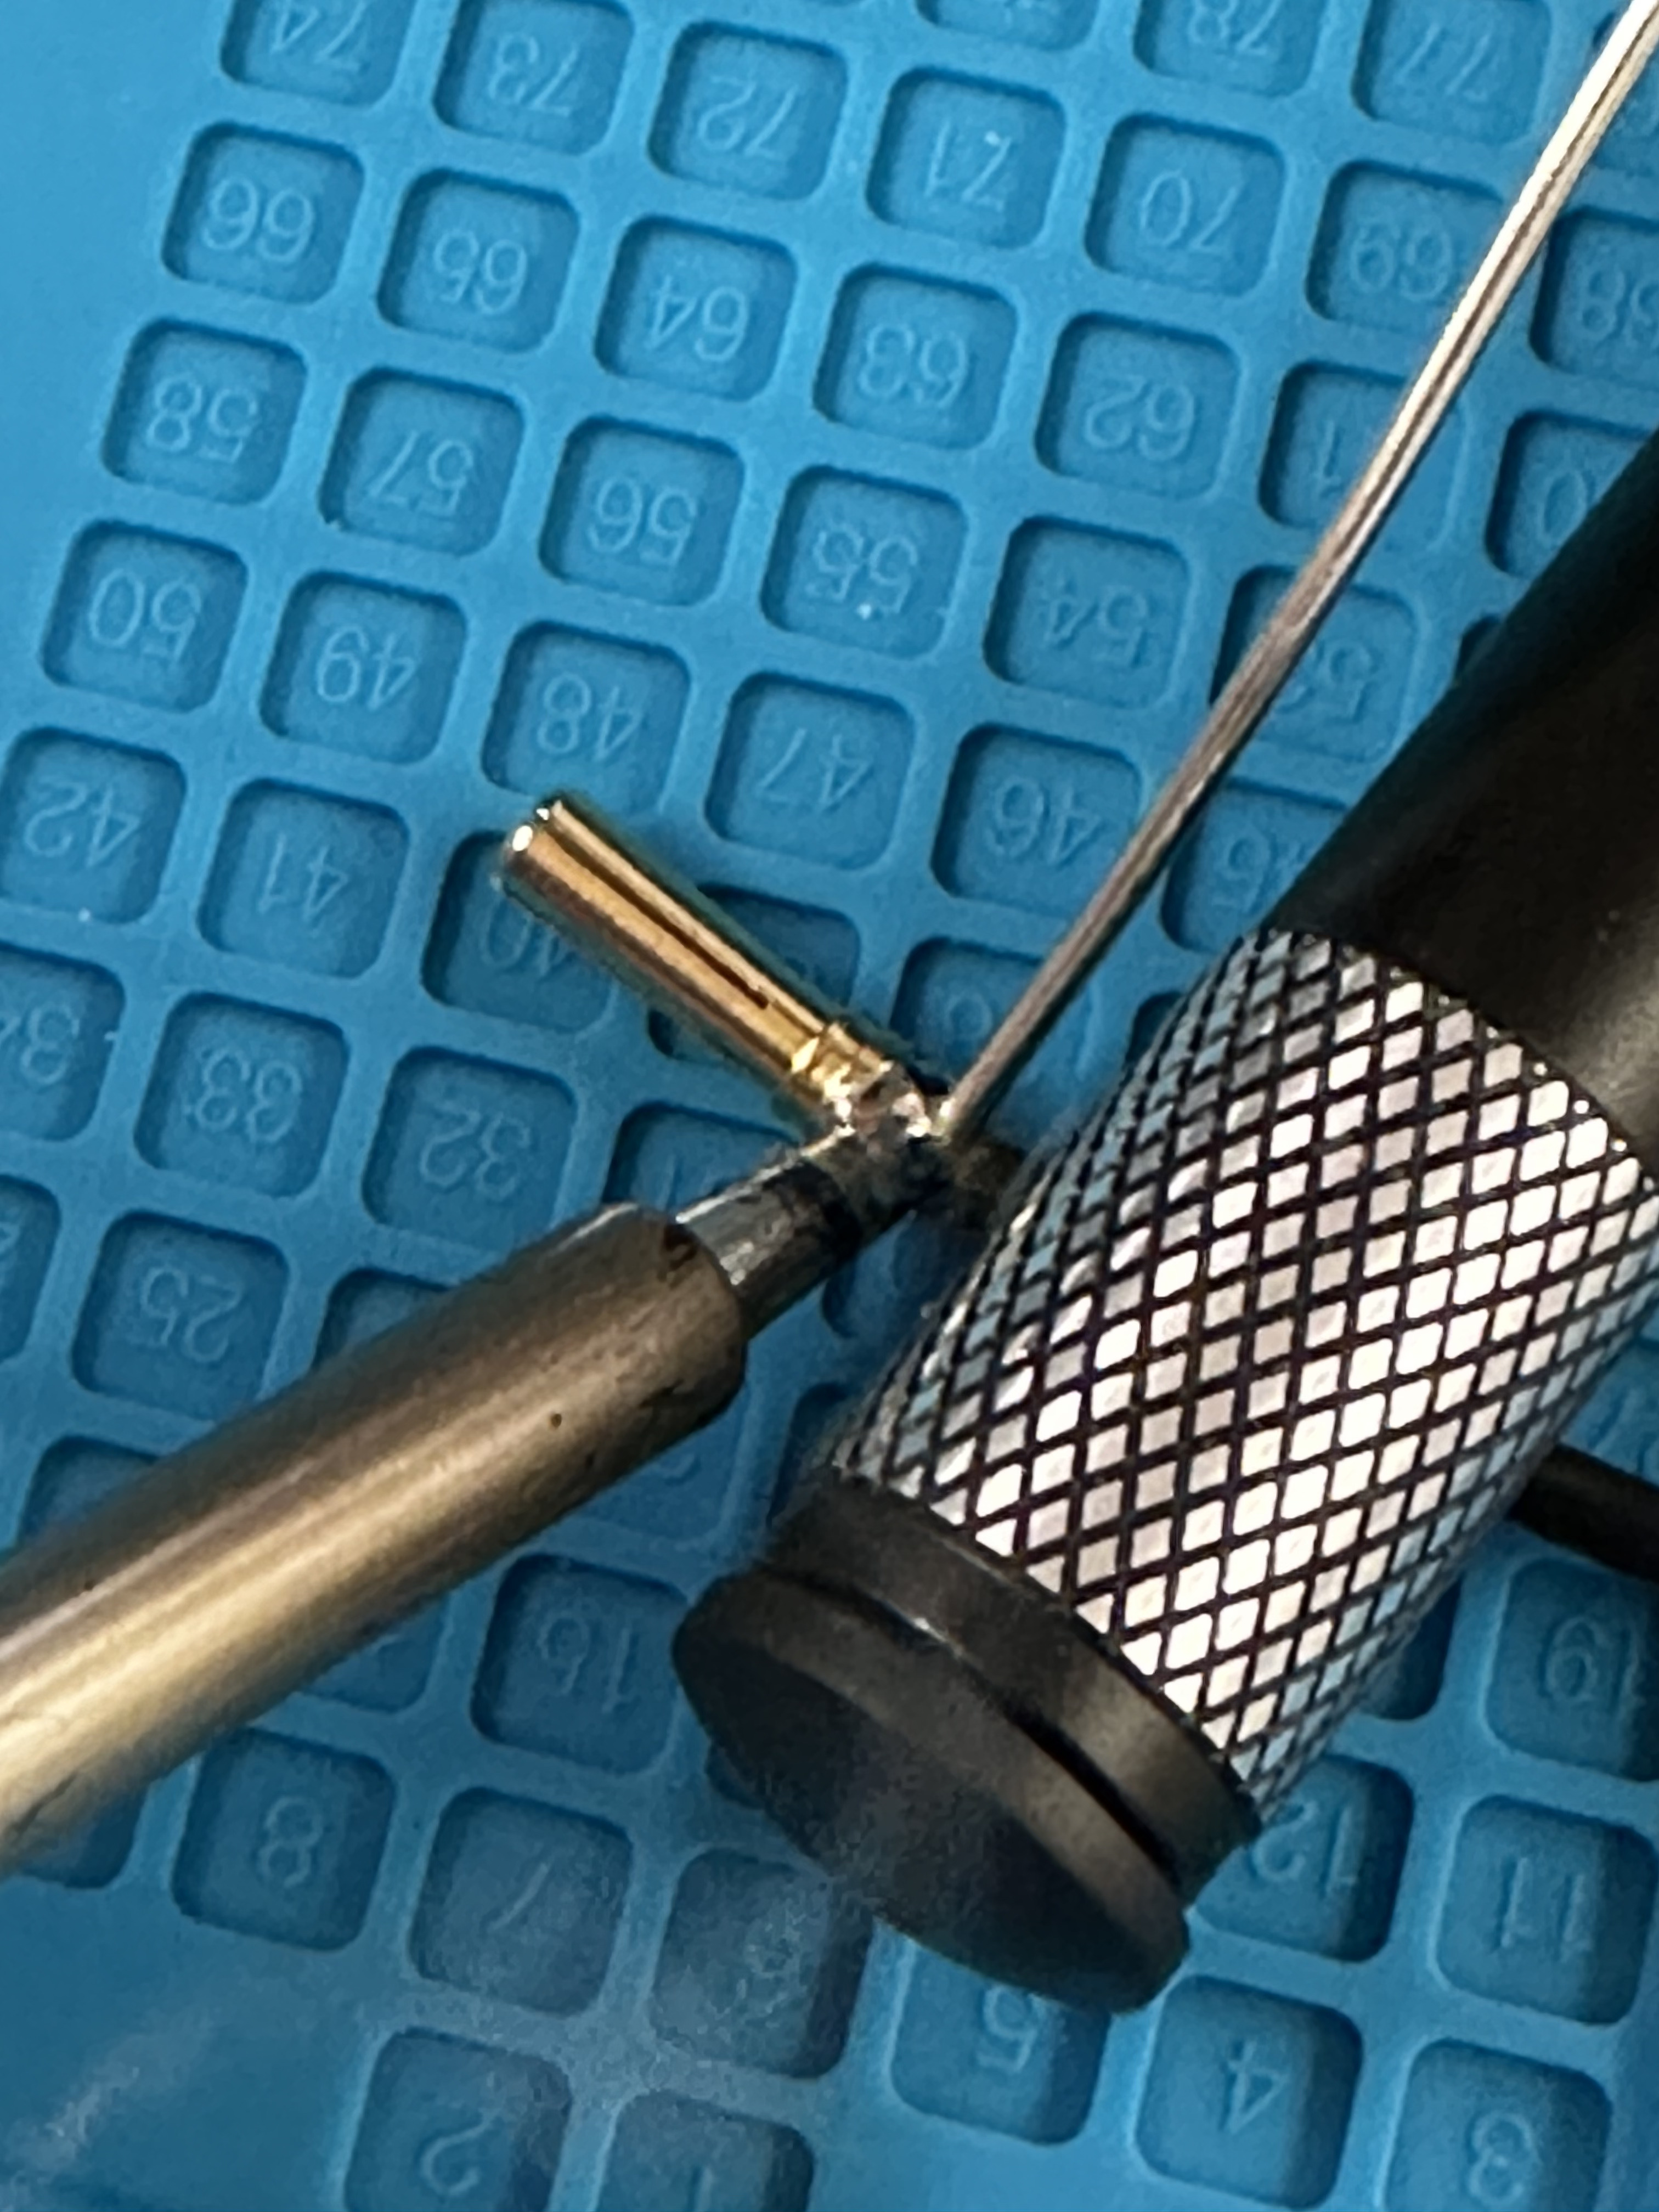
- Press the iron where the wire and connector meet.
Warning
Do not touch the connector’s tip directly — the one below is scrapped.
- Touch the solder to the iron—it should melt instantly.
- Feed solder into the joint from the side, until the wire is fully covered and gaps are filled. Feed faster than expected.
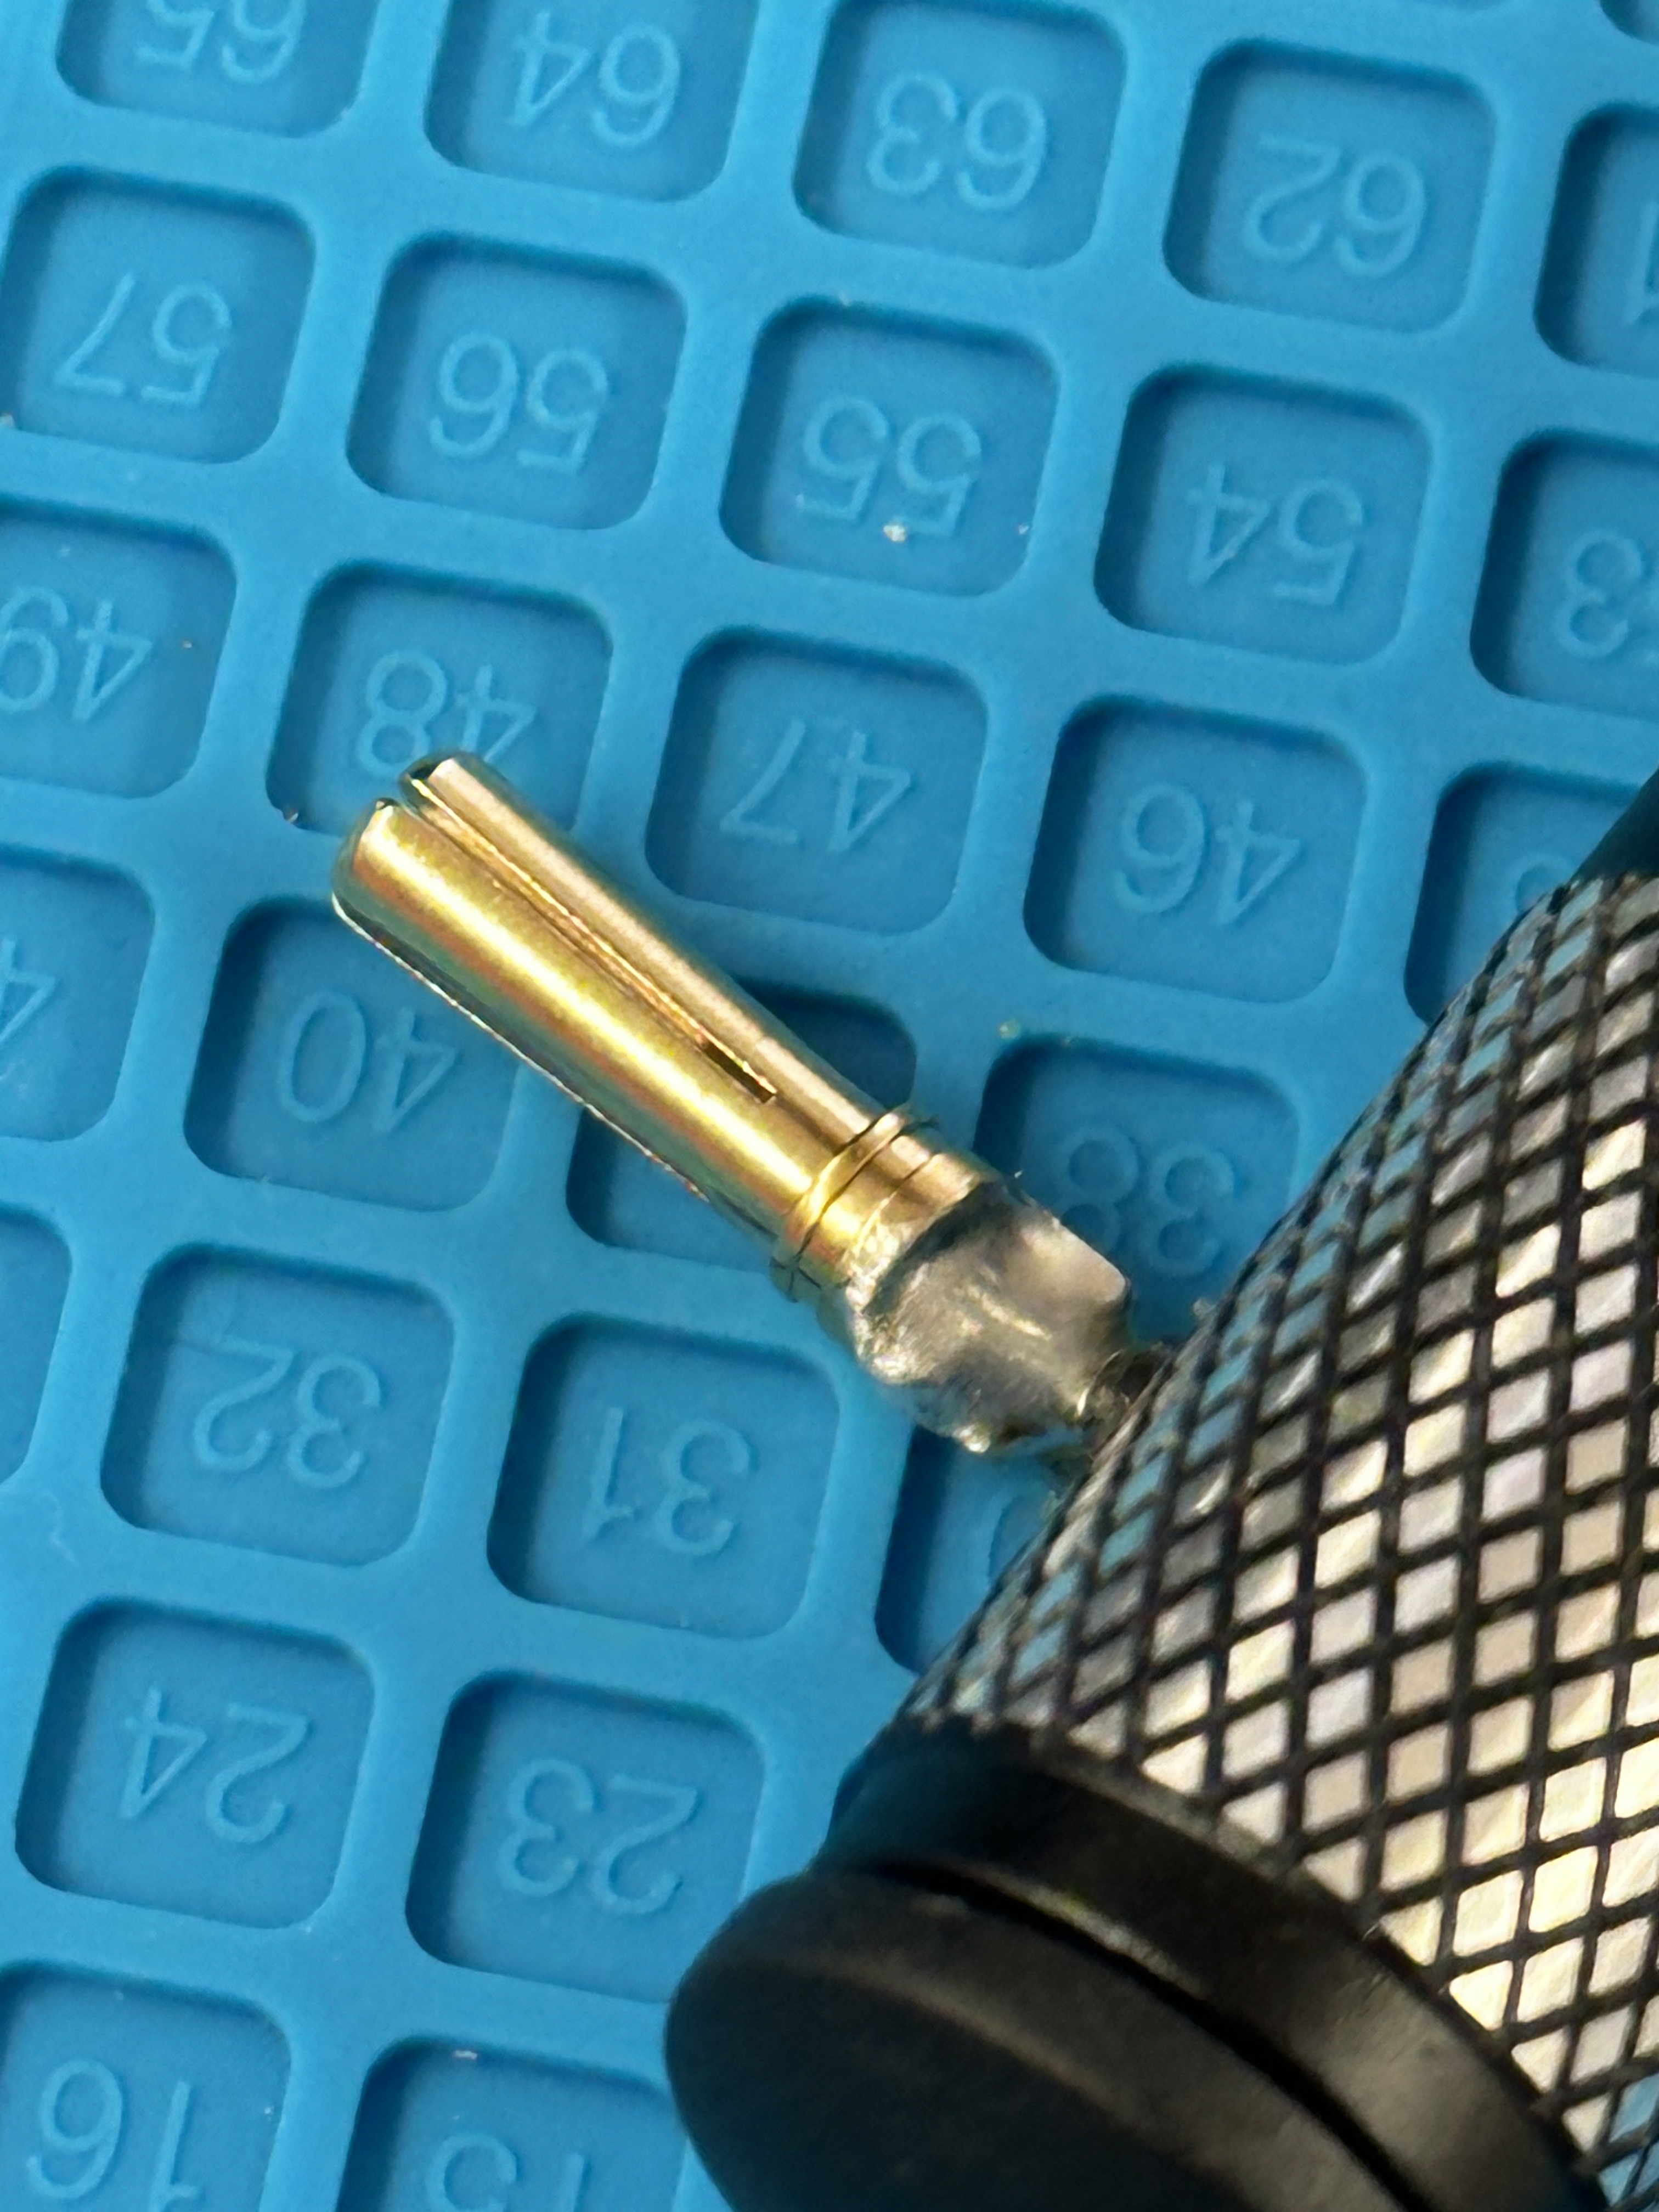
- Aim for a smooth surface finish that contours the connector.
Warning
Avoid soldering the outside surface of the connector.
Check and Secure the Solder Joint
- Lift the iron and let the solder cool.
- If needed, reheat to adjust or add more solder.
- Once cooled, test the joint’s strength by gently tugging the connector with pliers.
Apply Heat Shrink Tubing
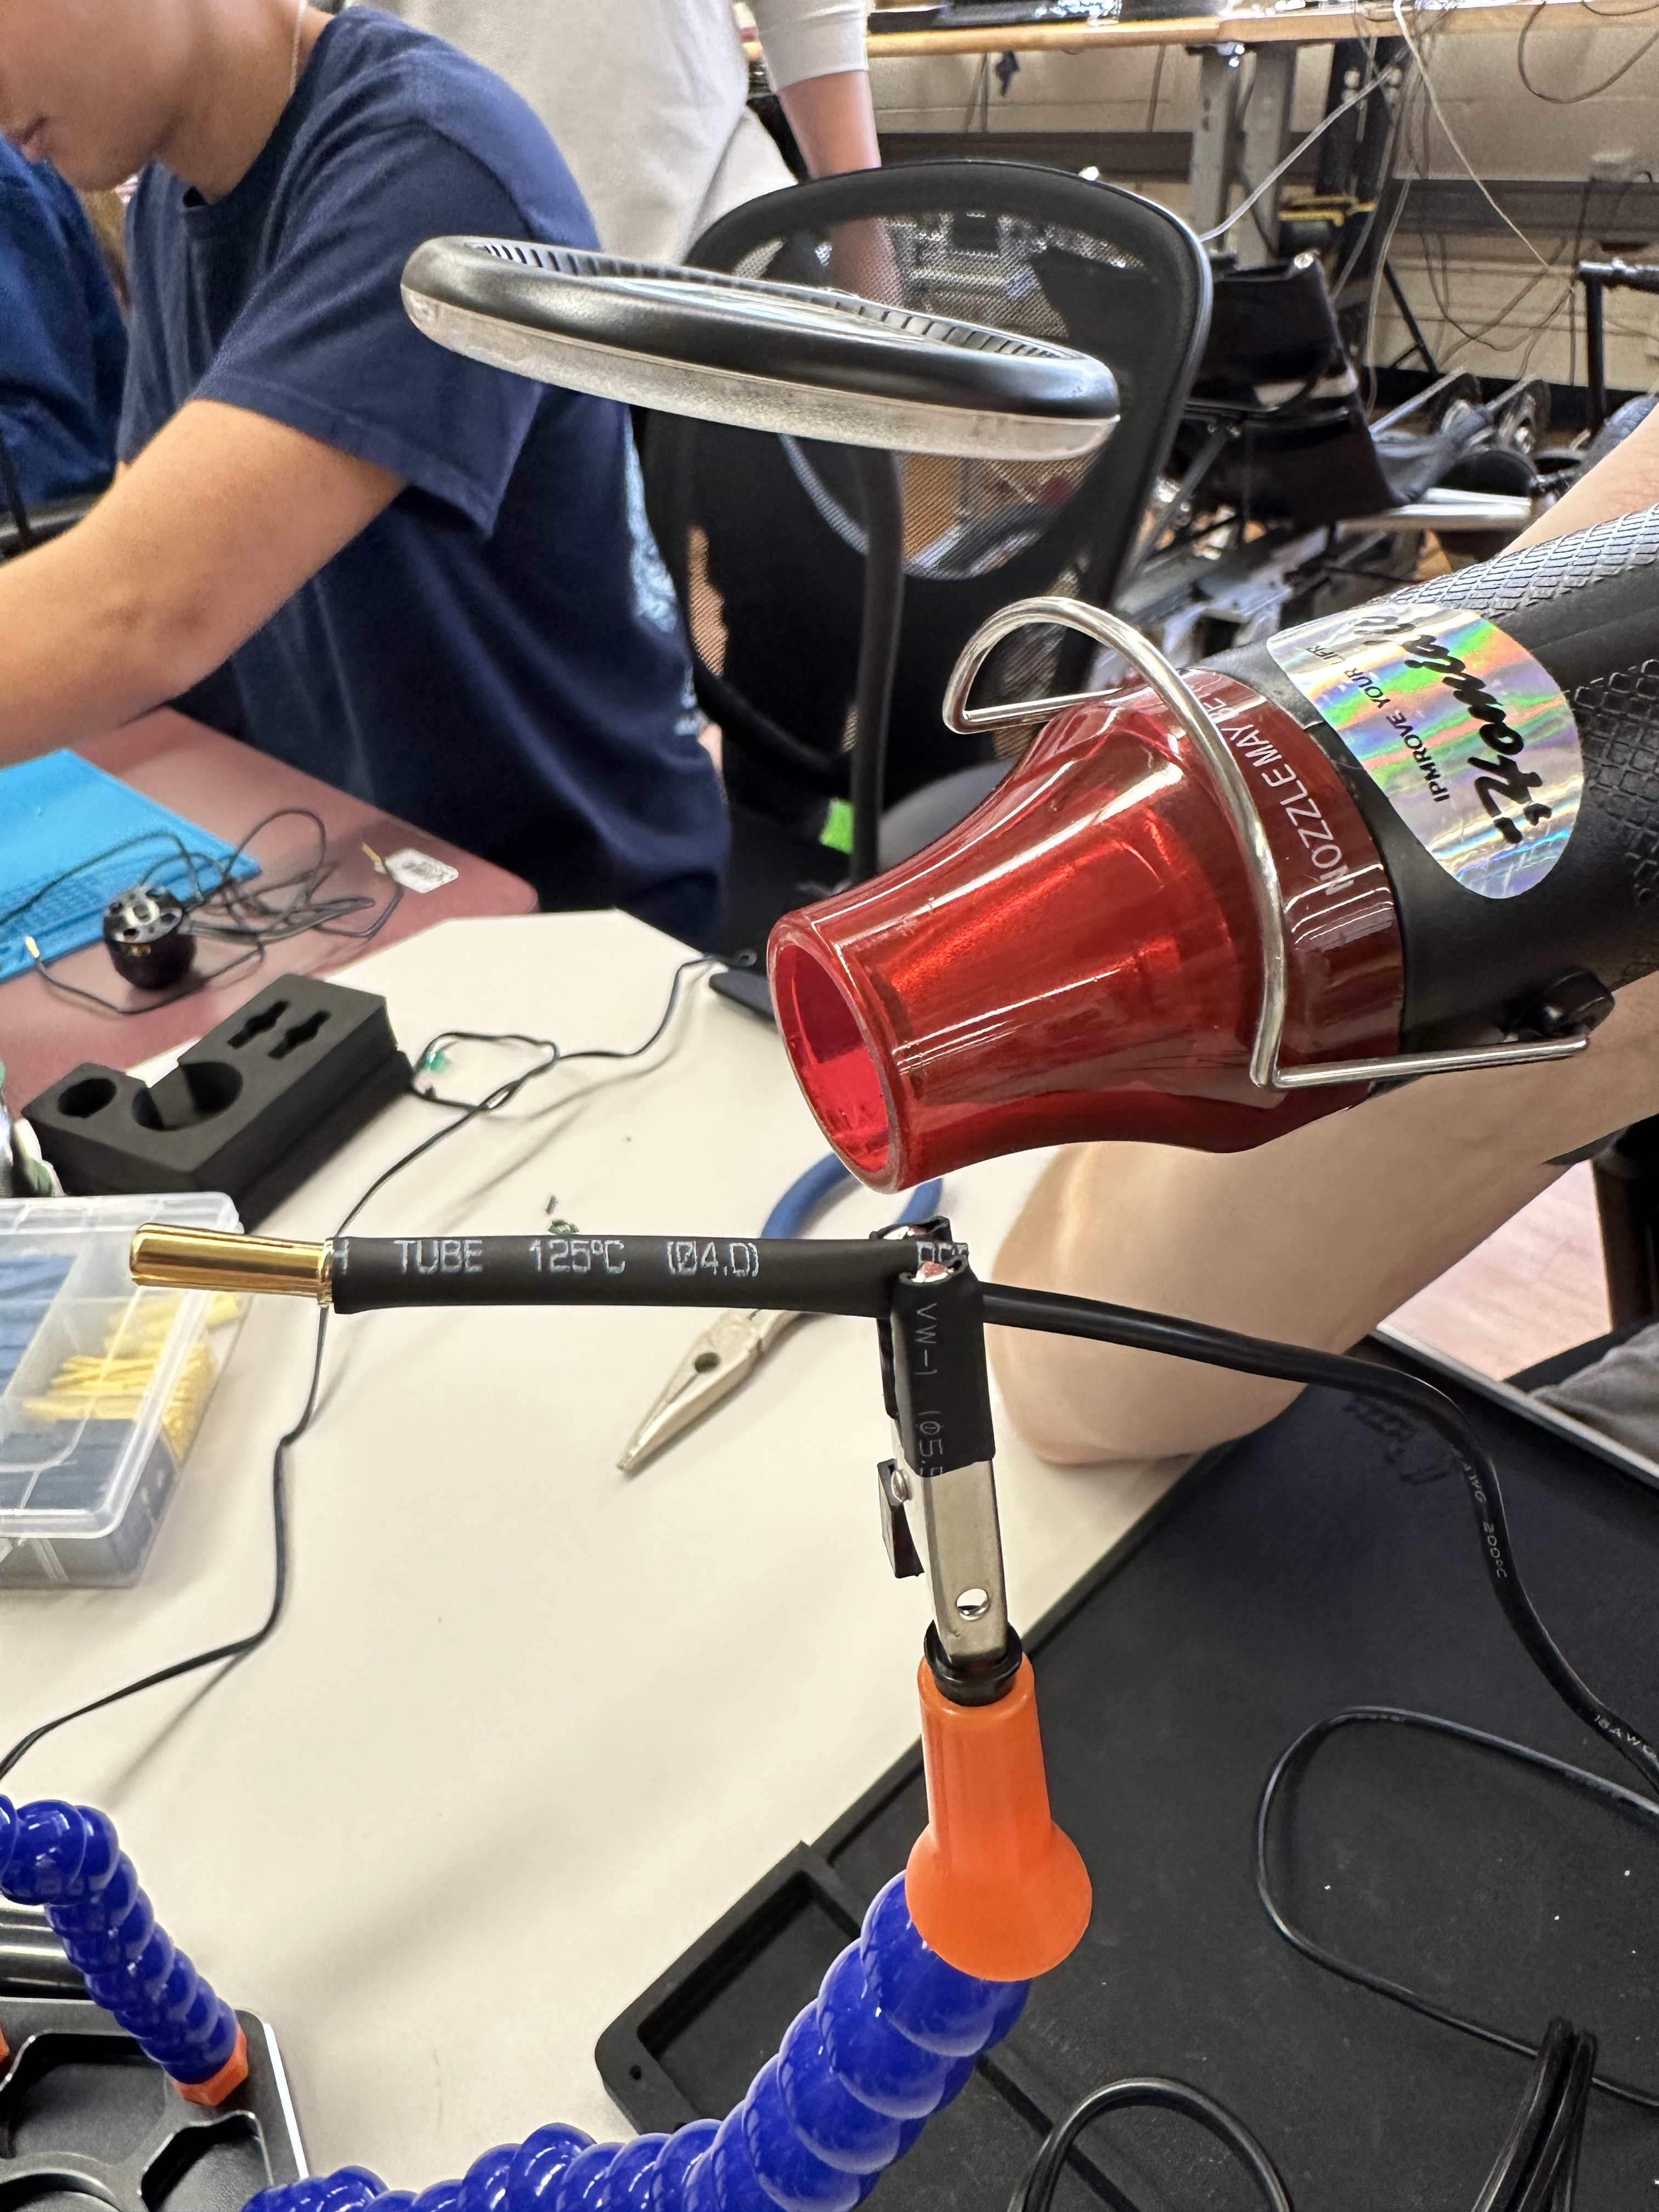
- Slide a properly sized heat shrink tube over the connector.
- Position it to cover the bulge.
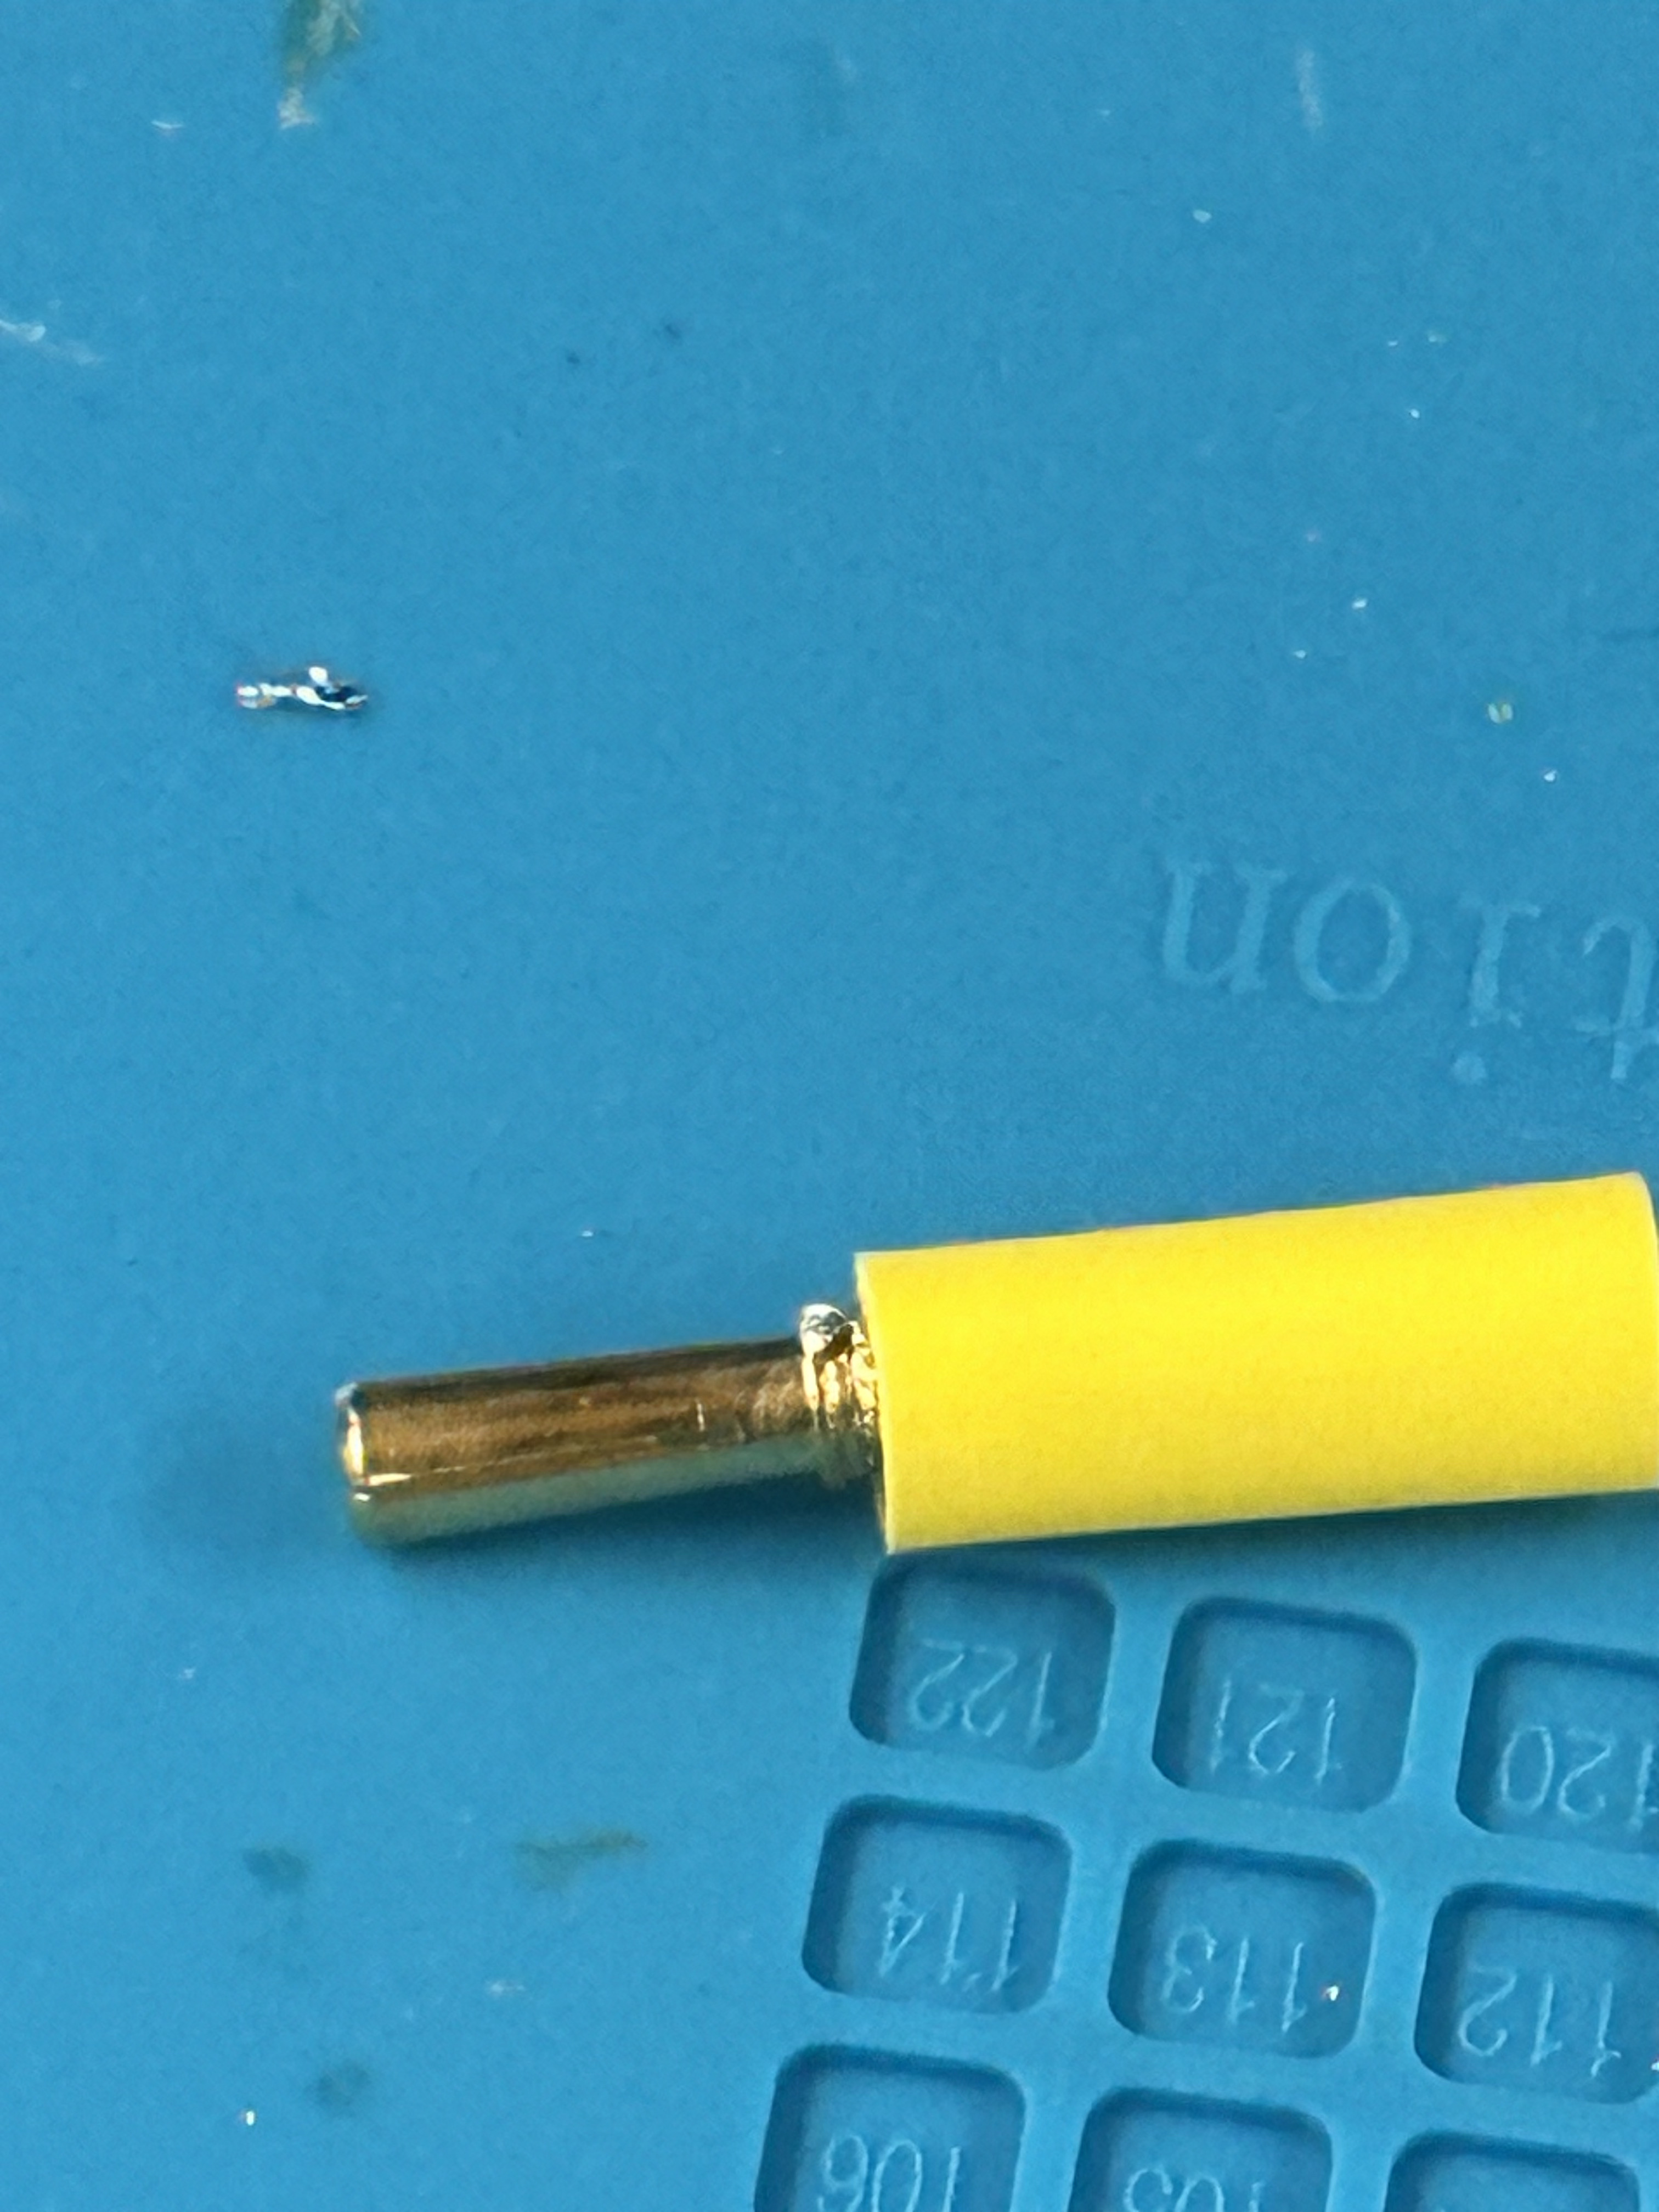
- Use a heat gun to shrink the tubing snugly.
Repeat for Remaining Connectors
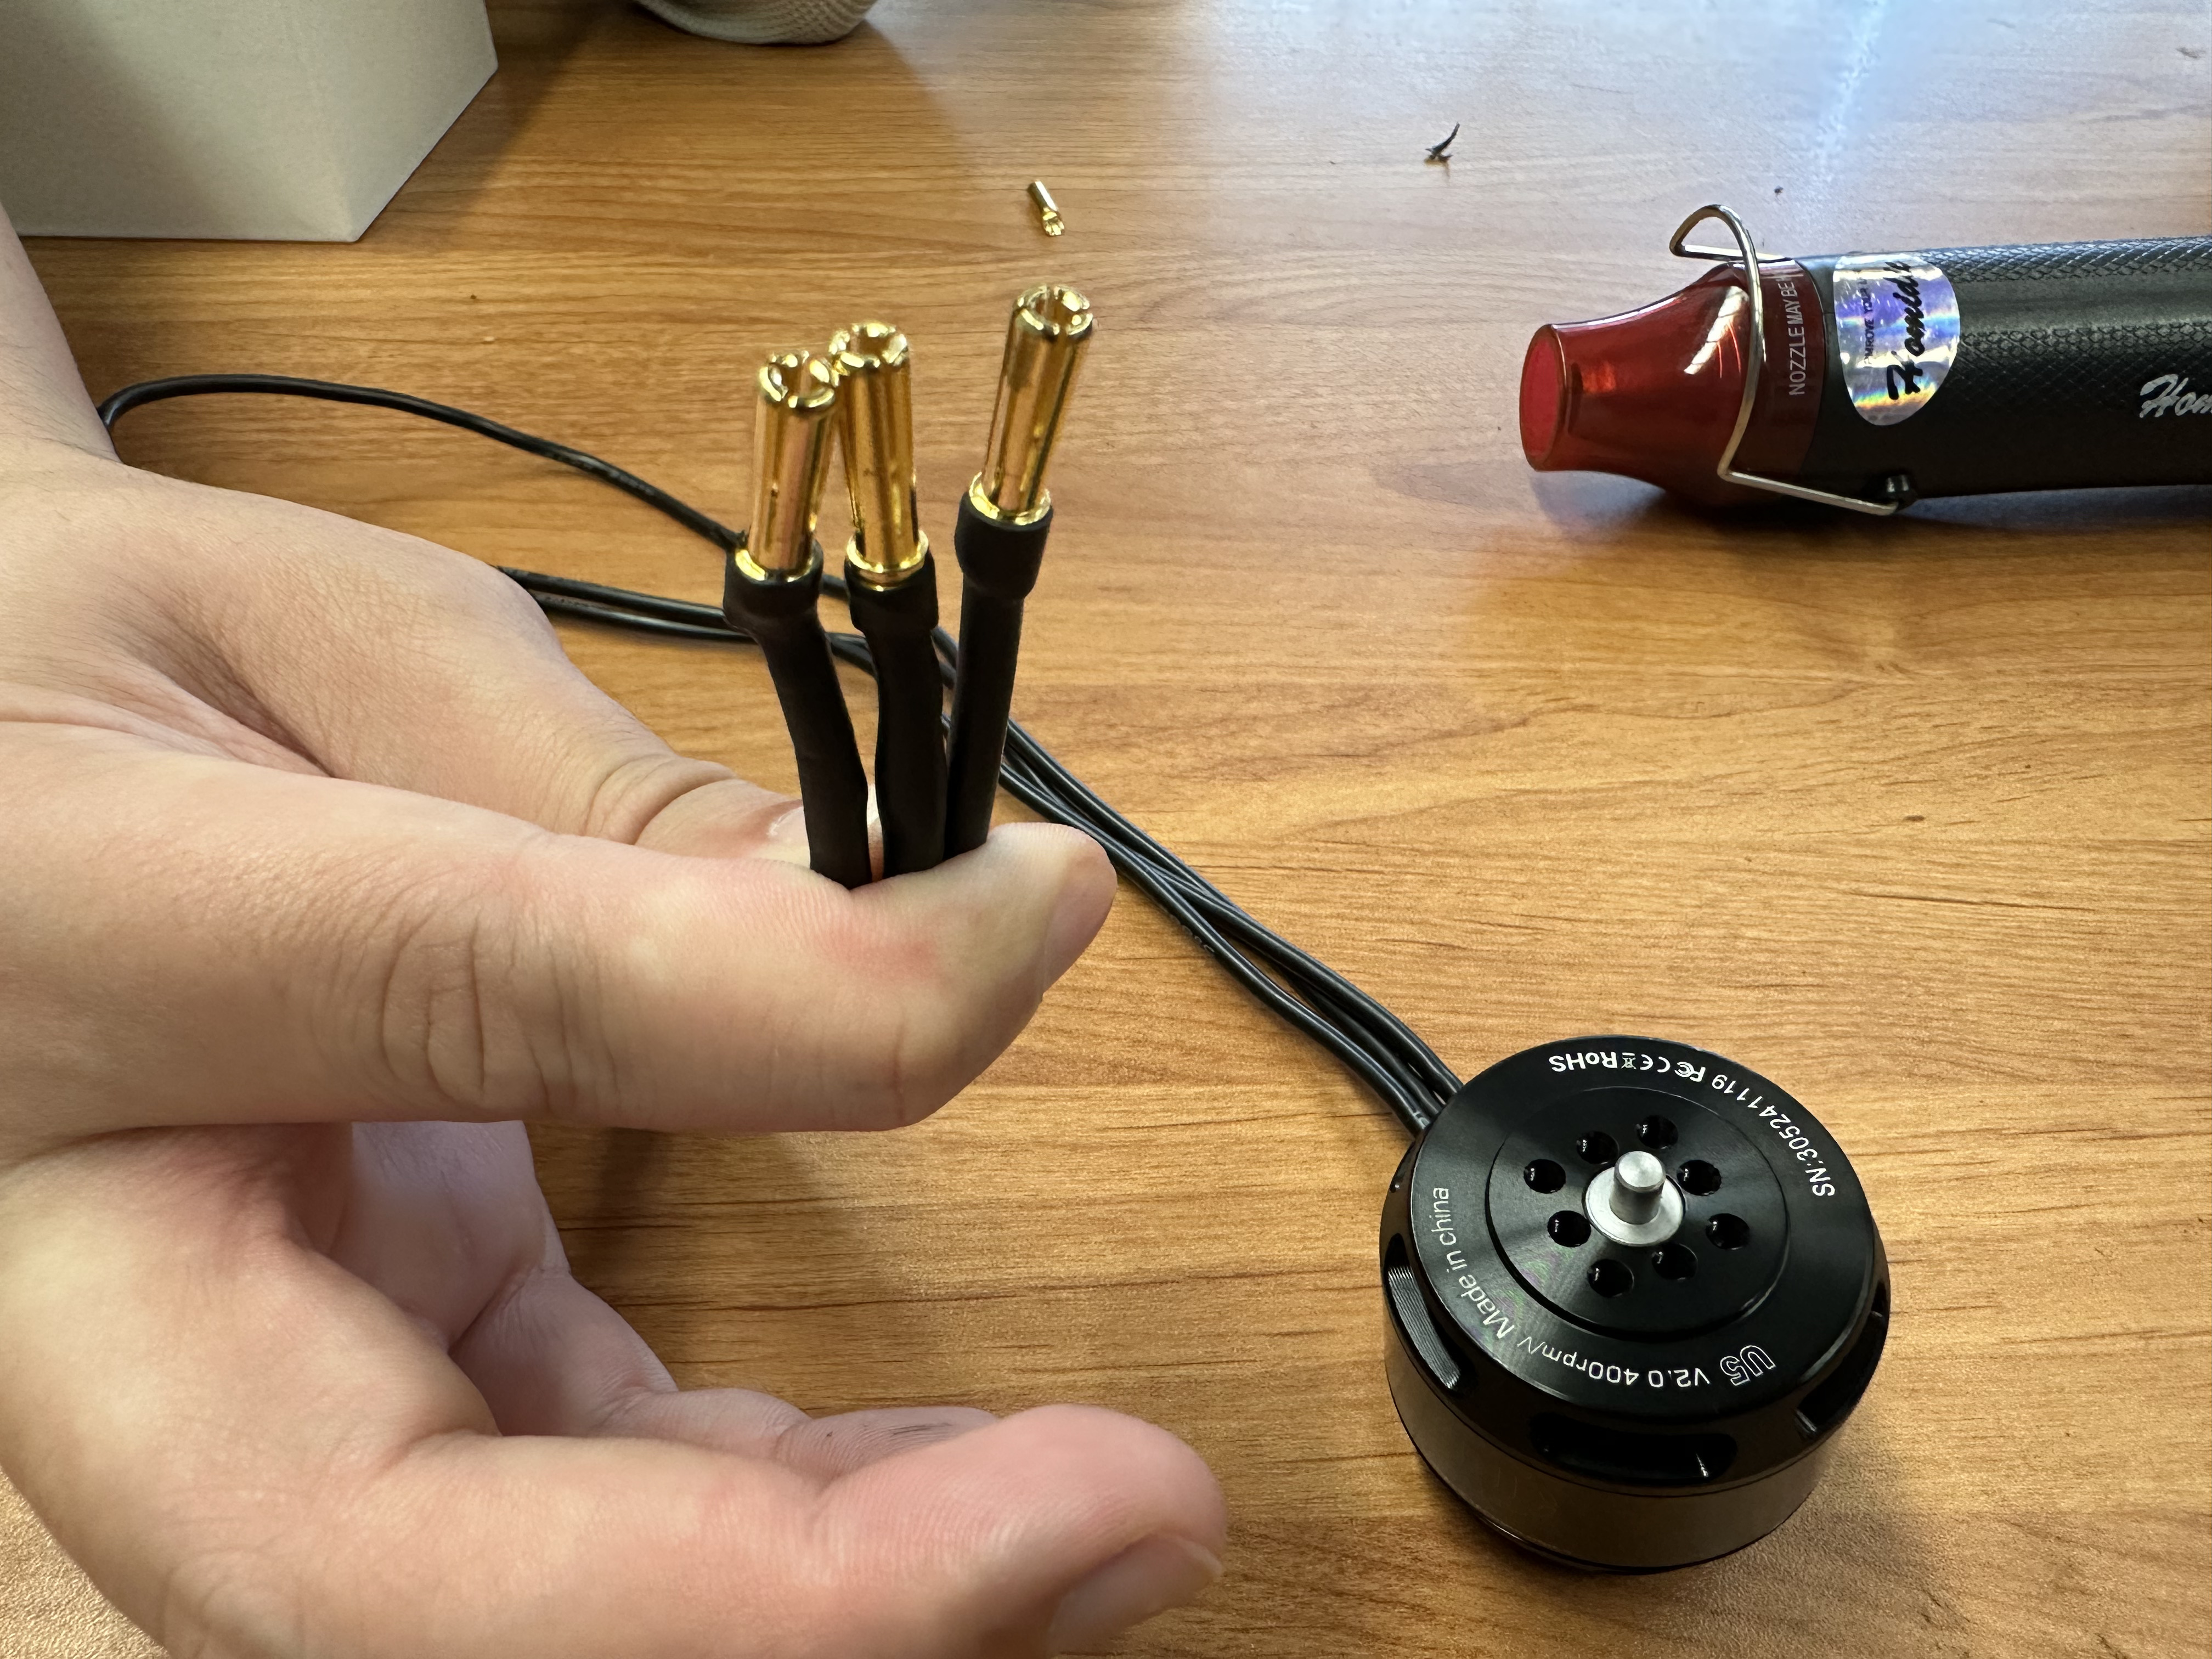
- Repeat the steps from "Prepare the Motor and Wires" through "Apply Heat Shrink Tubing" for all three motor wires.
- Inspect all solder joints for consistency and quality.
Commission the Motor
- Once all connectors are properly soldered and insulated, the motor is ready for use.
Clean Up
- Turn off all tools and equipment.
- Dispose of any leftover material or trash.
- We use lead-free solder, but treat it like leaded: 🧼 Wash your hands thoroughly.
Troubleshooting
- Dirty soldering tip: Re-tin the tip regularly.
- Rough surface finish: Use flux and apply heat from the side of the iron, not the tip.
- Desoldering: Lay the wick on the target area and apply heat from the side of the iron until the solder liquefies.
- Solder not attaching: Hold the iron on the joint longer to heat all parts (workpiece, wire, and solder) evenly.
- Excessive errors: Cut the wire, strip, and start over.
- White surface finish: Caused by excessive heat. Solder faster.
- Surface imperfections (e.g., black or orange areas): Remelt and add solder, or redo the joint completely.